
The Self-Service Computers window allows you to specify one or more computers which the selected user(s) or group(s) will be able to access the Local Administrator password for. This allows for “power users” to be setup with access to a small number of computers where granting access to an entire Organizational Unit is not desirable.
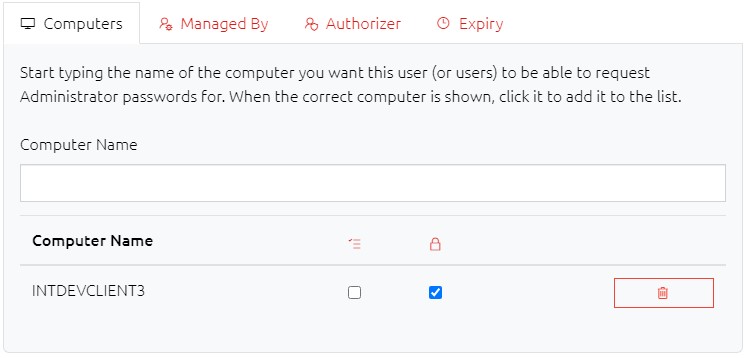
Beside the computer name are two checkboxes which are (from left to right): Require Justification and Require Authorisation. These work much the same as regular user permissions where if the first box is checked, the user will be prompted for an explanation of why they’re accessing the password, and the second will additionally require an Nominated Authoriser to approve or deny the request before the Self-Service user can actually access the password. Only one of these boxes can be checked at a time for each computer.
Warning: When selecting multiple users/groups and opening this window, all of the Self-Service computers for all of the users will be shown. Saving Changes now will grant access to all of those computers to all of the selected users. For this reason, it is recommended to only edit one user at a time.
Manually Adding Self-Service Computers
To add a computer, start typing its name in the Computer Name field. You will be presented with a list of similar matching computer names from Active Directory.
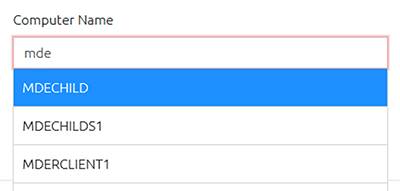
To add one of the displayed computers, simple click its name and it will be added to the list of computers below the computer name box.
Using Active Directory’s “Managed By” Property
An alternative (or addition) to adding the computers one-by-one here is to check one of the Active Directory “Managed By” option under the Managed By tab.
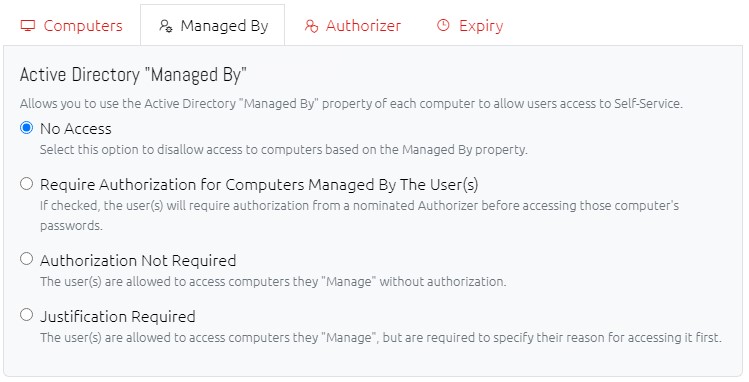
Selecting either the Require Authorization for Computers Managed By The User(s), Authorisation Not Required or Justification Required options will, when a user goes to their Self-Service page, also show a list of any computers that the user is marked as the Manager of through Active Directory.
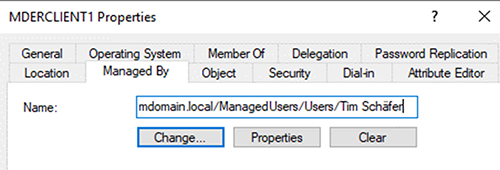
This can be a quicker way of setting up Self Service if you have already populated this value, or if you are planning to populate it by, for example, exporting the information from SCCM by a script.
For information about the Self-Service experience, see Self Service.
Requiring Authorisation
For manually added computers, the Require Authorisation checkbox indicates that the user must first submit an Authorisation Request and have it approved before they can view the computer’s password.
When using the “Managed By” feature, you can also select whether an Authorisation Request is required or not by selecting the appropriate option.
Entra Self Service
Entra devices can be added to Self-Service users from the Entra tab. The two options available are:
- Allowing users to access any device that they are the “Owner” of in Entra.
- Manually added devices by name.
If adding a device by name, check its Device ID matches your records as duplicate names are permitted in Entra.
Neither the Authorisation Request or Justification systems are currently implemented for Entra Self-Service.
Authoriser
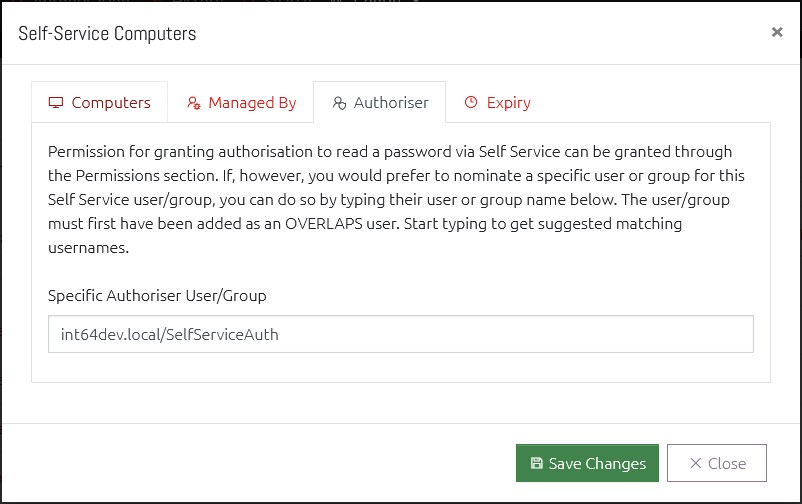
To nominate a user or group who can provide or deny authorisation requests generated by a Self Service user you can use one of two methods:
Authoriser
You can add the Authoriser user or group to the Active Directory container permissions (see Container Permissions), and check the option Authorise Self-Service Access Requests. This will grant the user permission to authorise requests from Self Service users on all computers in this container.
Self-Service Authoriser
Alternatively, you can specify the user/group in the Self-Service settings dialog as shown above. This will allow the user to authorise Self Service requests only on the computers in this Self-Service setup.
Automatic Expiration
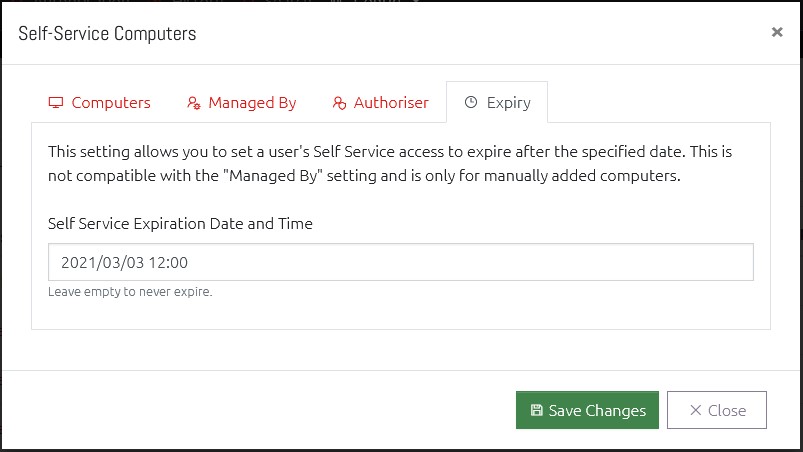
If you want to grant temporary Self-Service access then you can specify an expiry date and time. After this time the user will lose access to all of their Self-Service computers listed under the Computers tab. Note this does not apply to access granted by the Managed By property.
The user is not removed after this expiry date, rather they just lose Self-Service access. This means they can easily be re-activated again at a later date if needed without having to go through the whole setup again.
Moving Computers
It is important to note that, for security reasons, if a computer is moved from its Organizational Unit to another, any users with that computer added to their Self Service computer list will lose access to it until it is removed and re-added to their list.
This behaviour can be changed using the Automatic Self-Service Cleanup Mode setting in you Security settings.