
If you wish to make use of the ability to retrieve Bitlocker Recovery Keys from Active Directory then the OVERLAPS server must be granted permission to read them.
Bitlocker Keys make use of the Active Directory Confidentiality bit, which is designed to limit visibility of the object or property to only users who have full control access to that object.
There are two ways to grant access to view this data: the quick, easy and arguably less secure way, and the more in-depth but ultimately more secure way. If you are in any doubt as to which method is best for you, or if you require more information, it is recommended to consult official Microsoft’s documentation on the topic.
The Quick Way
The quick way involves granting OVERLAPS full delegate rights to an Active Directory container in which the Bitlocker secured computers are located.
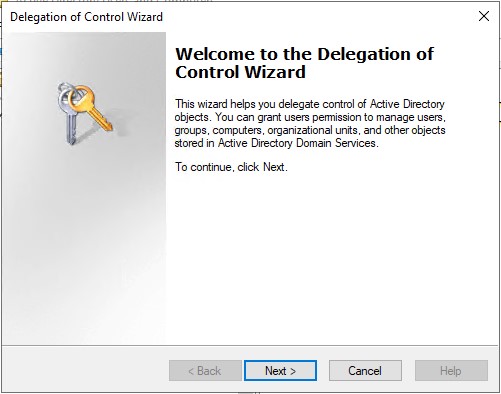
- Right click the Organizational Unit or Container and click Delegate Control

- This launches the Delegation Control Wizard
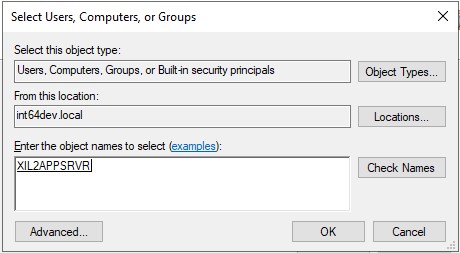
- Click Add and add the OVERLAPS server (if you can’t find it, click Object Types and make sure Computers is checked). Note that if you’re using a Service Account in the Active Directory settings (see Settings – Active Directory), then enter that account instead.
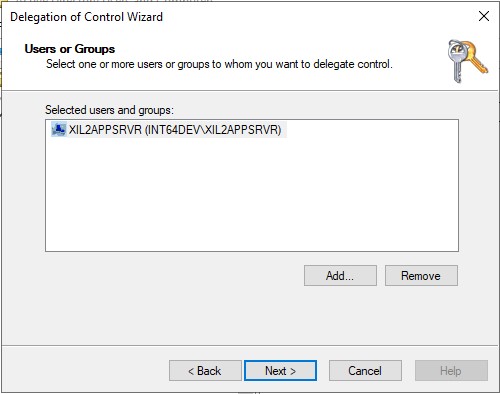
- Click OK to add the server to the Users or Groups list, click Next
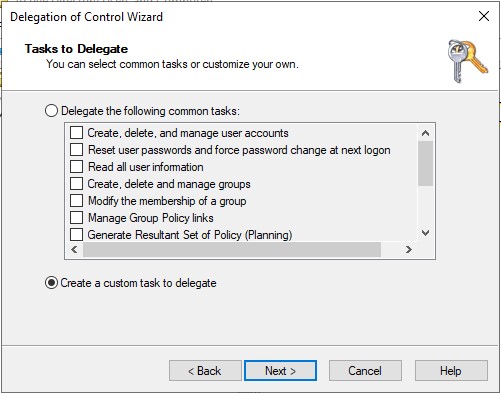
- Select Create a custom task to delegate
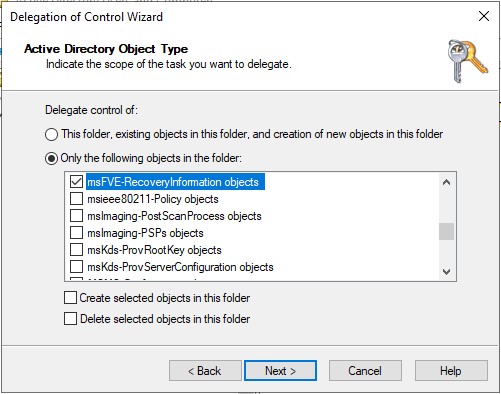
- Select Only the following objects in the folder, then check msFVE-RecoveryInformation objects, then click Next
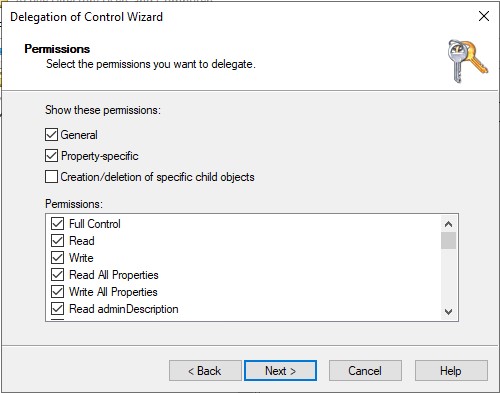
- Select the Full Control checkbox, then click Next
The More Secure Way
More advanced control over access to the Bitlocker Recovery Key object can be achieved using Microsoft’s Ldp.exe tool. This involves directly editing the ACL Security Descriptor on an OU and can lead to unexpected results, this should only be carried out by an experienced person who is confident in what they are doing.
The basic logic is that any property or object with the Confidentiality bit set requires a user with the “Control Access” permission to access it. The only way to achieve this when editing an OU’s permissions normally is by granting Full Control to it. This unfortunately necessitates giving up far more control over the container/object than is actually necessary though. However, by setting an Access Control Entry (ACE) manually through Ldp.exe, you can specify only the permissions you actually need. The steps to achieve this are shown below.
- Run Ldp.exe
- Connect to a Domain Controller by going to Connection -> Connect, and entering it’s details.
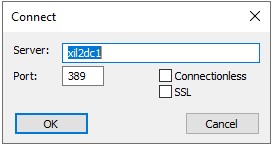
You should see that a connection has been established.
- Set the Server Binding Information by going to Connection -> Bind.
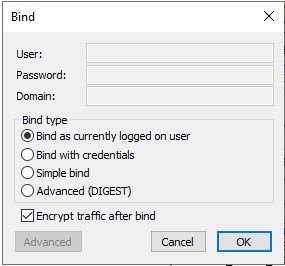
- Open your Active Directory tree by going to View -> Tree, and clicking OK (leaving BaseDN empty).
- Navigate to the OU containing your Bitlocker secured devices
- Right click the OU and select Advanced -> Security Descriptor
- When prompted to confirm the Distinguished Name (DN) of the object to edit, click OK.
- You will see the Security descriptor for the container object.
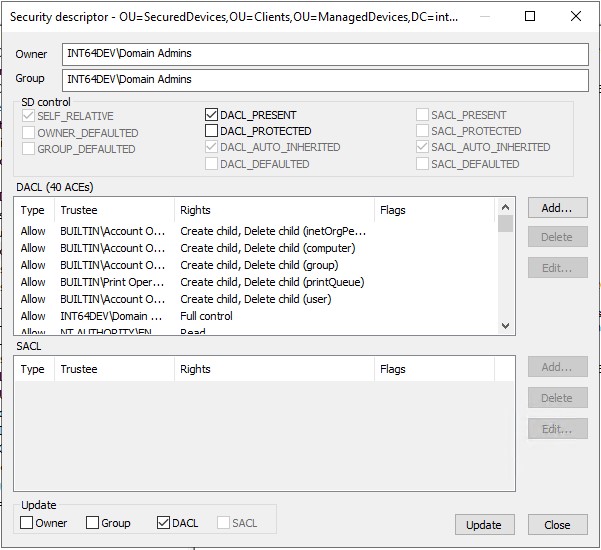
- To add an ACE, click the “Add…” button.
- Fill out the information for the new ACE as shown in the example below. In this example we have created a group “BitlockerReader” to control access so that we don’t have to go in and edit ACEs every time we want to make a change:
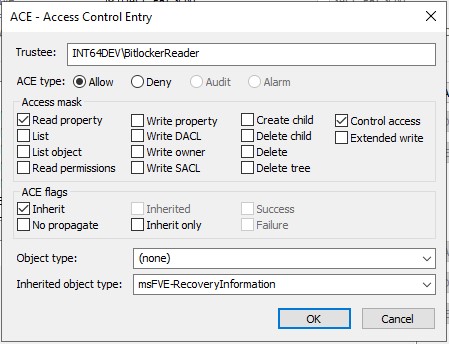
The fields to edit are:
- Trustee: The User or group name in the form domain\username
- ACE type: Allow
- Access Mask: Read property, Control Access
- ACE flags: Inherit
- Object Type: (none)
- Inherited Object Type: msFVE-RecoveryInformation
Once done, click OK to add the ACE to the container and then click Update to apply the change. Changes made here may take some time (possibly up to 4 hours) to propagate through AD, and may require the OVERLAPS service to be restarted to take effect.
Note that there are reports that on Windows Server 2016 version 1607, ldp.exe may not allow you the option to change the security descriptor.
You can read more about the Confidential bit and granting permission to read properties at: https://docs.microsoft.com/en-us/troubleshoot/windows-server/windows-security/mark-attribute-as-confidential