
In this guide we’ll tell you how to brand various parts of OVERLAPS to make it your own.
Text Customisation
Under Config -> Settings -> Customisation -> Branding you will find two options for what OVERLAPS calls itself:
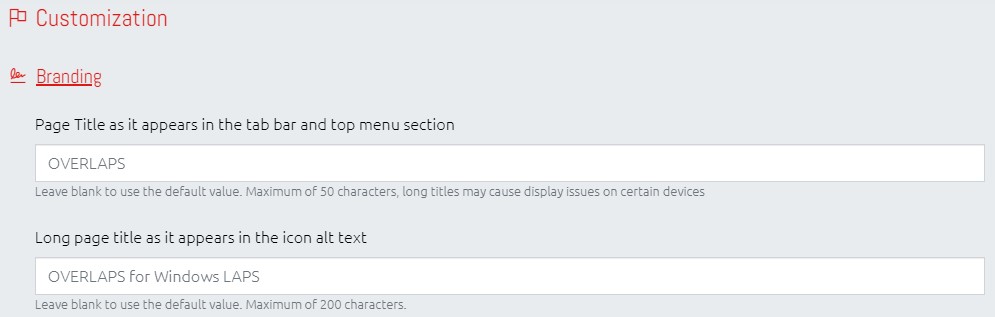
Page Title
This setting defines the text that is shown both in the tab title and the header menu bar.
Long Title
Defines the text that appears when you hover your mouse over the logo in the menu bar.
Image Customisation
There are two images that are currently customisable: the site logo and the icon as displayed in your browser’s tab bar (which actually consists of three image files).
Before you can replace these with your own images, you will need to follow these steps:
- Navigate to “*C:\ProgramData\Int64 Software Ltd\OVERLAPS*“
- Create a new folder called “override“
- Open the new “override” folder and create another folder inside it called “img“.
The structure should now look like this:
-> C:\ProgramData\Int64 Software Ltd\OVERLAPS\
       -> override\
              -> img\
Customising the Site Logo
The site logo is a PNG image file no larger than 64×64 pixels. Once you have your replacement logo, put it in the “img” folder and name it “logo-64.png“.

Once that’s done, if you restart the OVERLAPS service it should now display your logo.
Customising the Icon
The icon consists of 3 files:
- favicon.ico – An Icon File supporting various resolutions (typically 16×16, 24×24, 32×32, and 48×48). This goes in the root “override” folder.
- icon-16.png – A 16×16 PNG image file which goes in the “img” folder.
- icon-32.png – As above, but 32×32 pixels.
Once these have been added to the override folder you should have this structure (including the Site Logo):
-> C:\ProgramData\Int64 Software Ltd\OVERLAPS\
       -> override\
           -> favicon.ico
           -> img\
                  -> logo-64.png
                  -> icon-16.png
                  -> icon-32.png